Selasa, 19 Januari 2016
Tutorial Step by Step Drive Test 2G,3G and Reporting using Tems 11 and Mapinfo With Audio
Tutorial Step by Step Drive Test 2G,3G and Reporting using Tems 11 and Mapinfo, Group 1
https://youtu.be/OIvF_d66pSI
Tutorial Step by Step Drive Test 2G,3G and Reporting using Tems 11 and Mapinfo, Group 2
https://youtu.be/-42Wd21aZZo
Tutorial Step by Step Drive Test 2G,3G and Reporting using Tems 11 and Mapinfo, Group 3
https://youtu.be/xHLsmYxHoH8
Tutorial Step by Step Drive Test 2G,3G and Reporting using Tems 11 and Mapinfo, Group 4
https://youtu.be/h4ZfbkI-4GQ
Tutorial Step by Step Drive Test 2G,3G and Reporting using Tems 11 and Mapinfo, Group 5
https://youtu.be/JAvZzMnCtMw
Tutorial Step by Step Drive Test 2G,3G and Reporting using Tems 11 and Mapinfo, Group 6
https://youtu.be/mVP1mJMjKLg
Tutorial Step by Step Drive Test 2G,3G and Reporting using Tems 11 and Mapinfo, Group 7
https://youtu.be/bKghB7gthDE
Tutorial Step by Step Drive Test 2G,3G and Reporting using Tems 11 and Mapinfo, Group 8
https://youtu.be/LlwE95q5F1k
Tutorial Step by Step Drive Test 2G,3G and Reporting using Tems 11 and Mapinfo, Group 10
Tutorial Step by Step Drive Test 2G,3G and Reporting using Tems 11 and Mapinfo, Group 12
https://youtu.be/lN758Lwc8qU
Tutorial Step by Step Drive Test 2G,3G and Reporting using Tems 11 and Mapinfo, Group 13
https://youtu.be/GKRQSbwqfTo
Kamis, 29 April 2010
MapInfo (Plot IEs)
Before post process in mapinfo, created *.tab file from logfile in TEMS :
1. Export logfile : Menu Bar Logfile -> Export Logfile
2. Click Add Order ![]()
3. Choose Format : MapInfo Tab-file
4. Setup IEs (Info Elements)
for GSM Dedicated or Idle :
- RxLev Full (dBm)
- RxLev Sub (dBm)
- RxQual Full
- RxQual Sub
- SQI
- TA
- Cell Id
- Frequncy Band
- Latitude
- Longitude
for WCDMA Dedicated / Idle / Scanner :
- AS Cell Name
- AS CPICH Ec/No
- AS CPICH RSCP
- SAN CPICH Ec/No
- SAN CPICH RSCP
- SAN Cell Id (CI Part)
- Sc 1st Aggr Ec (dBm) -> Scanner
- Sc 1st Aggr EcIo (dB) -> Scanner
- Sc Best SC -> Scanner
- Latitude
- Longitude
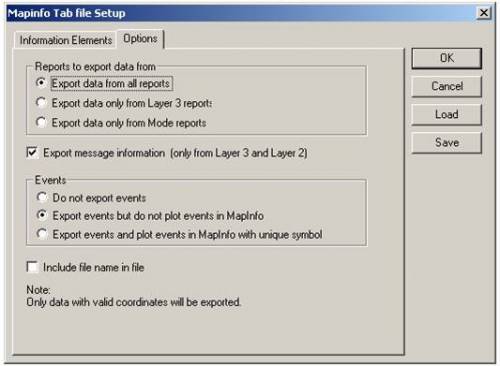
5. Configure Options Tab
6. Save *.mex
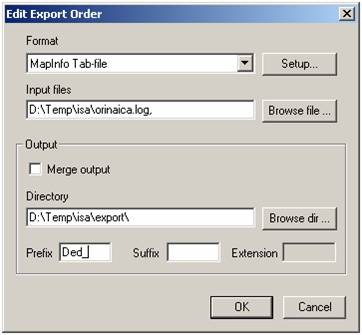
7. Choose Logfile : Click Browse file
8. If there are more than one logfile we can merge it by Merge Output
9. Choose Output directory : Click Browse dir
10. Give Prefix : Ded if Dedicated and Idle if Idle
11. Start process, click start ![]()

12. If done, status Success
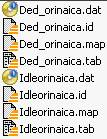
13. There were created four files for each action (*.dat, *.id, *.map, *.tab)
14. Open the exported file into MapInfo : Menu Tab File -> Open
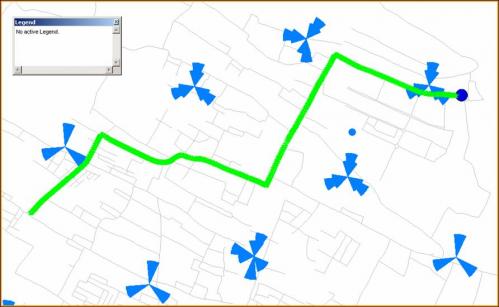
15. Create Thematic Map : Menu Tab Map -> Create Thematic Map
16. Choose Type -> Range
17. Template Name -> Region Ranges
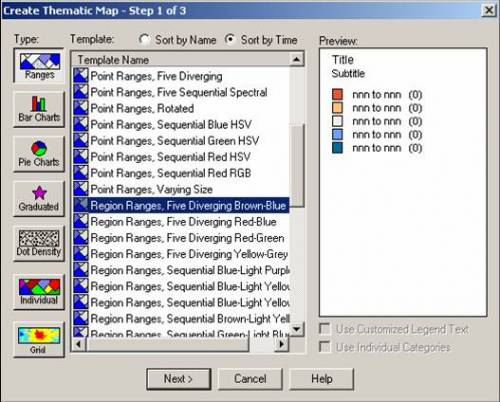
18. Choose Table and Field (ie. Plotting RXQUAL_SUB from Dedicated mode)

19. Customize Ranges, Style and Legend.
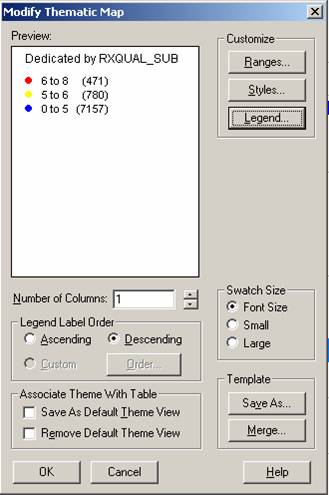
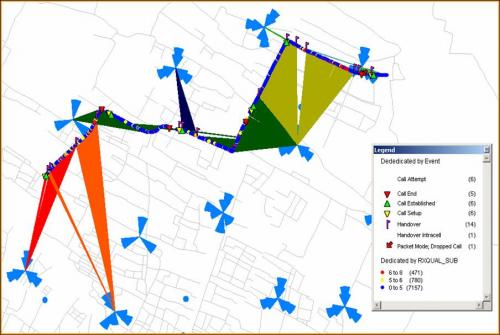
20. Example Dedicated by RXQUAL_SUB
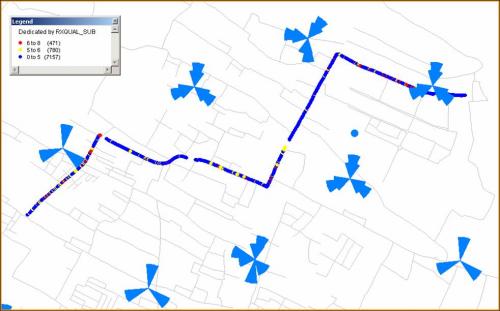
EVENTS on RXQUAL_SUB
21. Create Events on RXQUAL_SUB
22. Open again the exported file (Ded_orinaica)
23. Create Thematic Map : Menu Tab Map -> Create Thematic Map
24. Choose Type -> Individual
25. Template Name -> Region IndValue Default
26. Choose Table and Field
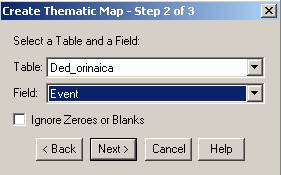
27. Customize Style and Legend
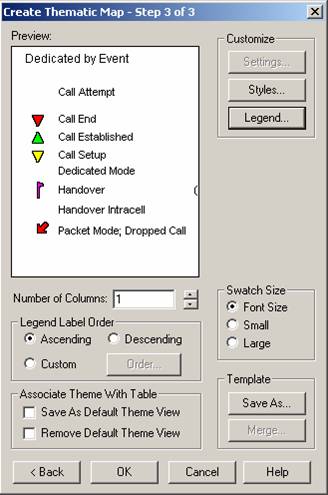
28. Example Events on RXQUAL_SUB
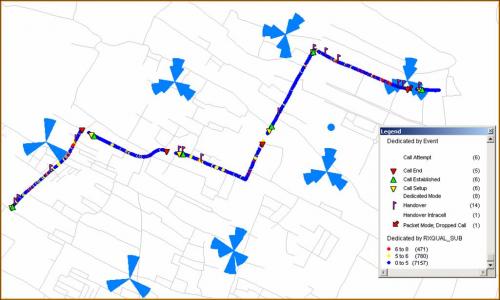
SPIDER GRAPH
29. Activate spider graph : Menu Tab Tools -> Tool Manager
30. Spider Graph Load and Autoload
31. See table structure of cell in MCOM Site : Menu Tab Table -> Maintenance -> Table Structure -> View/Modify Table choose MCOM Site
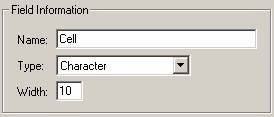
32. See table structure of CI in exported file : Manu Tab Table -> Maintenance -> Table Structure -> View/Modify Table choose exported file (ie. Ded_orinaica) -> Change type structure of CI

33. Click OK
34. Create Spider Graph : Tools -> Spider Graph -> Spider Graph
35. Choose Origin and Destination table
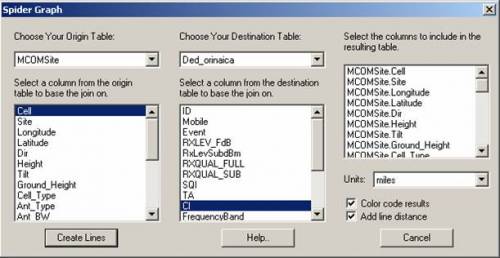
36. Save the Spider Graph table : Save Copy As -> (ie. orinaica)
37. From Spider Graph, We can analyze :
- Dominant Cells
- Overshoot Cells
- Swap Feeder
